By now, you’re probably accustomed to the gorgeous, highly detailed, sculpture-like models you see all the time in the 3D printing community. There’s no shortage of artistic and creative design in all categories. You can find just about anything, from D&D figurines and miniatures to aesthetic decor pieces and functional designs that’ll make your life easier.
But you may have yet to be introduced to the art of using of 3D printing to magnify the beauty of the humble 2D image, and that’s where HueForge comes in. This powerful software can turn almost any 3D printer into a multicolor printing powerhouse – and we’re here to guide you through it!
In this article, we’ll go over what HueForge is, a few things you might want to keep in mind before you get started, how to add the program to your setup, how to create a print, and we’ll wrap things up with a few tips and tricks. Ready to add depth and color to your prints?
What Is HueForge?
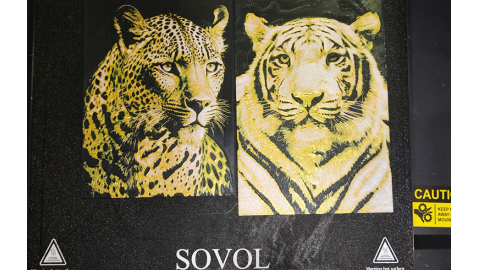
In simple terms, HueForge converts 2D images into multicolor 3D printed objects without the use of multicolor printers or setups. How do you create color complexity without extruding multiple colors? By stacking different color layers of filament on top of one another. Due to the inherent translucence of filament, the stacked layers combine to form different gradients and blends where the light passes through. Within this stacking, the magical illusion takes shape.
HueForge calculates the precise thickness and blending needed to produce the correct color gradients and ensure everything blends seamlessly to form a detailed image. The result is a 3D printed object that looks far more complex and refined than its 2D counterpart, without needing to melt and mix filament (and requiring a setup that can do this).
It starts with a 2D graphic, of course. The software turns it into a black-and-white image to help it better distinguish between light and dark areas. If you increased the layer height it would make that layer darker (and vice versa if you decreased it), because of the filament’s transparency. Plus, you can specify the colors you want to use and HueForge will calculate how to blend them for optimal results.
The software then generates a text file with the color changes and filament swap instructions. This allows the printer to pause and prompt you to change filaments at the appropriate layers, ensuring that the final print looks as intended.
Before Getting Started
While HueForge can work with just about any 3D printer, there are a few important prerequisites to note:
-
Filament change capability: Your 3D printer needs to be able to pause so you can change filaments. Most printers with a filament run-out sensor are already set up for this.But it must meet the layer height of the model exported by Hueforge design,generally, the layer height is 0.08, which is lower than the layer height of 0.1mm,If you want to print the most detailed color painting, using a 0.2mm nozzle is the best choice, but the time will be much longer.(How to add M600 instructions on SV07/SV07PLUS?)
-
Slicer access: You need to be able to modify basic slicer settings.
-
Filament characteristics: HueForge has a large library of filaments for you to select from, but you can also add your own with a simple calibration print. Be sure that your materials match those included in the program for best results.
Getting Started
Slicing
-
Start your slicer. For reference, we’ll be working with Sovol SV06 ACE:An open source 3D printer from Sovol. Set Layer height 0.08mm,first layer height 0.16mm.
-
Import the STL. Depending on the size and layer height, it might take a few minutes to load, so be patient.
-
From the settings, ensure that no supports are enabled and that infill is set to 100%.
-
Slice the STL. Again, because of the settings, it might take a few minutes.
Manual Filament Change
-
Depending on the slicer, the following steps might be slightly different. But if you’re in Ocra…
2.Right click on the ‘+’ and select “Add Custom G-code”,Enter"M600".
start with black
swap to red at layer #9
swap to white at layer #15
|
|
|
|
3.Slice the model.
Once you’ve sliced the final model and you’ve sent it to your printer, be sure to stand by to make the necessary manual change of filament without risking the print cooling down too much. Because there won’t be an automatic purge, you might want to extrude a bit more filament to confirm that the previous color has been fully removed from the nozzle.
<Model@8ight_1804927 >
Notice
A general recommendation would be to avoid combining different filaments, such as PLA and PETG, given that this can cause issues due to their different melting points and properties. Sticking to one filament type per print and cleaning the nozzle thoroughly when switching filaments will help you get the best possible results.In order to print out the details of color gradient, the model exported by Hueforge Design has a very low layer height requirement, even lower than 0.1mm. Don't hesitate, quickly sense a hueforge of your own!







Leave a comment
All comments are moderated before being published.
This site is protected by hCaptcha and the hCaptcha Privacy Policy and Terms of Service apply.