


The hotbed shows -15°
1. Measure whether the resistance value of the hotbed thermistor is normal. Please feedback the resistance value after measurement for our judgment (it must be measured at normal room temperature, preferably with feedback pictures).
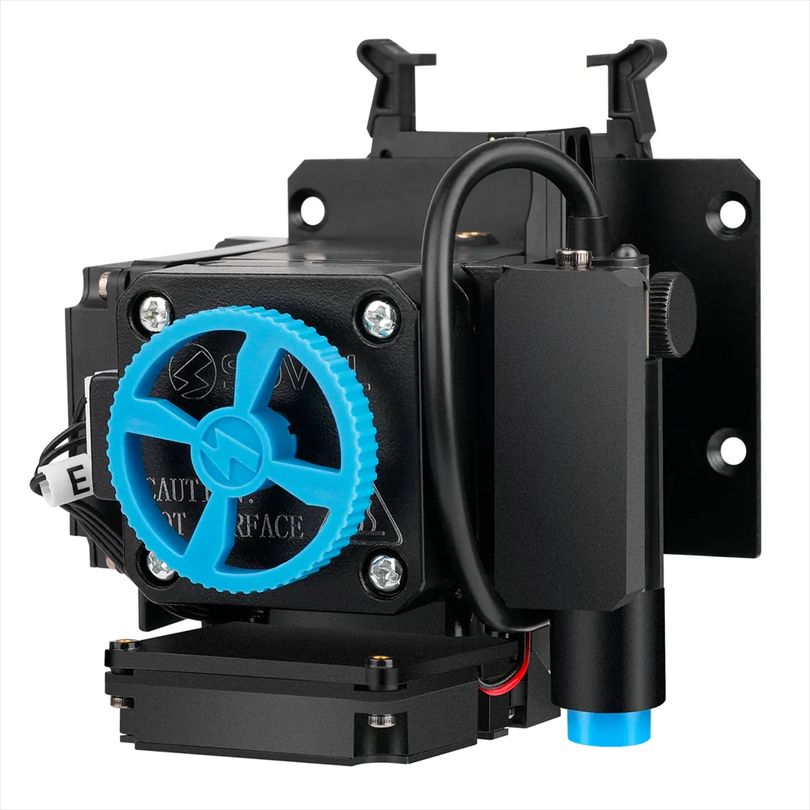
(Method of testing the resistance value: turn the gear of the multimeter to the 200KΩ gear, and put the measuring pen of the multimeter on the terminal of the thermistor wire. Refer to the picture, the method of the nozzle thermistor is the same as that of the hotbed thermistor.)
2. Measure whether the resistance value of the heating line of the hotbed is normal. Please feedback the resistance value after measurement for our judgment (preferably feedback pictures).
(Method of testing the resistance value: turn the gear of the multimeter to the 200Ω gear, and place the measuring pen of the multimeter on the two wires of the nozzle heating pipe. Refer to the picture.)

3. Measure whether there is an output voltage at the hotbed thermistor port on the motherboard.

Frozen Screen
If the Touchscreen of the SV04 freeze and stuck on the progress bar after booting up, please follow the steps below to fix the problem.
1. Power Supply Voltage: Check whether the power supply voltage is suitable for the local power Voltage.
2. Wiring: Please check whether there is any looseness or damage appear on the wiring of the Touchscreen. And please replug it first and make sure it is firmly connected.
3. Rename the mainboard firmware to cover the previous mainboard firmware. Like rename the original name to aaa.bin to refresh the firmware again.
Flashing Firmware Tutorial: https://www.youtube.com/watch?v=yQpjAJxdW_s
Firmware Download: https://sovol3d.com/pages/download
When turning the machine on, the loading screen comes up on the touchscreen and just stays stuck there. The loading bar doesn't even move at all
Fan Not Rotating
Mainboard Fan does not rotate.
1. Check if there is any looseness or damage appear on the wiring of the fan in the mainboard.
2. Use a multimeter to test whether there is 24V at the fan port of the mainboard.
If there is voltage appears, then it should be the problem with the mainboard. If there is no voltage appears, then it should be the problem with the mainboard fan.
Please feedback us about the problem you encounter and the troubleshooting you have done. We would arrange replacement for you to fix the problem.
Fan in the extruder does not rotate.
NOTE: Two fans in the extruder, one is blower fan(cooling the model), only works when the printer is printing; second is the cooling fan(for hotend), it works when the printer starts up.
If the fans in the extruder does not work as usual, please provide a video of the malfunctioning fan and also with the serial code underneath the hotbed with us. We would confirm the problem and provide you with replacement.
Fan Noise
If there is a abnormal noise appear on the printer, please confirm whether it comes from mainboard or the extruder.
1. Check whether there are any debris or wires interfering the fan rotation. If so, please clean them out and tidy the wiring up first.
2. Check whether there is any damage appear on the fan blades. If so, please feedback us with the photos.
3. Check whether there is any deformation appear on the fan cover and the bottom of the gantry.
4. Check whether there is any screw looseness appear on the fan cover. If so, please tighten it again.
Please follow the steps above for troubleshooting and provide result and a video of the noise with us. We would confirm the problem and provide correct solutions or replacement(if needed) on this issue.
SV04 Not Reading SD Card
If the SD card can not be read by the printer, you may encounter one of the problems listed below.
1. Incorrect Name of the STL. The name of the STL should not exceed more than 16 characters and with no special symbols.2. Problem With the SD Card.
-The SD card should be formated to the FAT32 format;
-The memory of the SD card should be less than 16GB;
-Check whether the SD card can be read by the computer;
-Use alcohol or an eraser to wipe the metal antenna of the SD card and try again to see if it can be read.
Extruder Collision
If you encounter the problem with extruder collision, please refer to the steps below to check with the firmware, and the printing mode first.
1. Mode Selecting: Make sure that the mode selected in the slicer is the same as the one selected on the printer, and check whether the placement of the model exceeds the range of the build size.(Do not forget to select the print mode on the printer)
Introduction on the 5 Print Mode of the SV04 https://www.youtube.com/watch?v=dU5mzzCqPJI
Note: Refresh the mainboard firmware before refreshing the Touchscreen firmware, otherwise it would cause a display freezing problem.)
And if the collision still happens after refreshing the latest firmware, please feedback us whether the collision happens before the printing,or during the printing,or after the printing. And provide us with the video and the above information,we will arrange correct suggestions for you.
Layer Shift
If the printing has serious layer shift, please refer to this vide for offset adjustment. https://www.youtube.com/watch?v=cAyyKszlYtE
And refer to this video to level the hot bed. https://www.youtube.com/watch?v=vKXkKp6SA_8
And there is still serious layer shift on the printings after the adjustment, please feedback the problems and photos of the printings with us.
Unstable/Decreasing Fan Speed
If the fan in the extruder does not working normally, and the speed of the fan is unstable or the fan speed decreases during printing, there might be something wrong with the power supply. Follow the steps below to do a troubleshooting and see if it needs a power supply replacement.
1. Test if there is a stable 24V at the output port of the power supply.
2. Heat up the nozzle to 230 degrees to see if there is any error appears on the display.
Please feedback the results with us with photos or videos. A power supply replacement can solve the problem.
Printing temperature fluctuation
If the printing temperature fluctuates a lot during the printing, it may be the problem with the PID value. It is recommended that you restore the printer to factory setting and refresh the firmware first.
If the problem still goes on after the suggestions above, please feedback us with the result.
Printing Halt Only With Loading Screen Left
If there is a problem with the multiple printing halt during the printing and with only loading screen left, it might be the problem with the mainboard and power supply. Please follow the steps below to provide information with us to confirm the problem.
1. Turn off the power supply and check whether there is any looseness or damages appear on the cables of the power supply and the mainboard.
2. Check whether the resume printing will appear after the sudden halt.
3. Try to refresh the firmware again, both mainboard firmware and touchscreen firmware need to be refreshed.
4. Take a picture of the display interface and also a picture of the extruder position with us after the printing halt.
Feedback us with the results and we will confirm the problem and provide you with correct solutions.
Fialment Stuck in The Extruder
If there is a piece of filament stuck in the extruder and hard to pull it out, then you can try to release the screws that fixing the throat first, and take off the hotend kit. Then disassemble the parts of the extruder and use a lighter to heat up the position where the filament stuck in the extruder to soften the filament. After that, try to use a wrench or other tools to pull it out.
Filament Detector Sensor
Malfunctioning Filament Detector Sensor: If the status indicator flashing irregularly or not lits after inserting the filament, it might be the problem with wire looseness or damages in the Detector sensor.
Please check with the wirings of the Detector sensor first to see if there is any looseness or damages appear on the wirings. And please also provide a video of the problem with us, we would provide correct solutions and replacement parts for you to fix the problem.
Z Offset Changes After Changing Print Mode
If there is a slight Z offset/nozzle position change after changing the printing mode to print, we can follow the steps below to make it right.
1. Restore the printer settings to factory settings and clear the previous leveling data first.
2. Completely loosen the leveling nuts under the four heated bed plates, and then re-adjust the tightness of the nuts(or roughly the same height).
3. Refer to this tutorial to relevel the hotbed https://www.youtube.com/watch?v=vKXkKp6SA_8
If the problem still goes on, please feedback us the result.
Extruder Clogging
Clogging issue might appear when the cooling is not sufficient or a malfunctioning motor.
If the clogging happens very often, we recommend that you refer to the steps below to make a adjustment and feedback us with the related information.
Two Main Reasons With the Clogging Issue.
- The cooling effect of the fan is not good, which causes the filament to soften and cause blockage at the position pointed by your picture.
- There might be some problems with the motor, causing the motor temperature to overheat during printing, and the cooling effect of the fan cannot keep up, resulting in the filament being softened and blocked at the extrusion position and cannot be extruded.
1. If the filament stuck in the extruder seat, please try to swap the other cooling fan of the second extruder to see if the clogging still happens. If not, then it should be the problem with the cooling.
2. Swap the other extrusion motor to the one that often gets clogging to see if the clogging still happens. If not, then it should be the problem with the overheating motor.
3. If the clogging issue happens in the nozzle, then please test whether there is 24V on the output Voltage of the mainboard.
4. Try to refer to this video to clean or change a new nozzle to see if the problem still appears.
5. Test the voltage of the thermistor to see if it is stable or not.
The outlet works but getting no power to the printer
1. Does the power supply voltage gear meet the local voltage?
2. Check whether the fuse at the power switch is damaged, refer to the picture.
3. Check whether the mainboard, power supply and power switch, and all cables related to power supply are firmly inserted and damaged.
You can refer to the video to measure the power supply output voltage: https://www.youtube.com/watch?v=F5V2vFOyiUs&list=PLltoLFLNi-ivWAmAGuVpwU2EabLSQgG21&index=15
4. Does the mainboard light up after you use the USB cable to power on?

Link to ultimaker cura software:
https://ultimaker.com/software/ultimaker-cura
How to set up dual color in the slicer?How to choose what parts get 2nd color?
Please refer to the video: https://www.youtube.com/watch?v=dU5mzzCqPJI&t=38s
The specs/dimensions of the film holders that sit on top of the SV04
Film holders_150×43×21_SPCC_T1.5_Black_Sand grain powder spraying

When setting up the SV04, how to get the filament through the filament sensor?
It’s ok as long as the filament passes through the hole.

Hot bed bending measurement method
1. First take off the glass bed and put it on a flat surface, then measure it with a ruler to see if there is any bending.
2. Remove the four leveling nuts under the hot bed, and measure the hot bed and the bottom slider plate respectively with a ruler. Check whether there is bending, refer to the picture.
3. For parts with unevenness, please send back the bending picture (must be the picture of bending after removing the leveling nuts).

How to get the slicing software for MacOS on the SV04 SD card?
You can download Ultimaker Cura and import the SV04 configuration file.
Configuration file:Tutorial video: https://www.youtube.com/watch?v=e6xyAWx9ybo


62 comments
Matt
How do I update the firmware from Cura on a Mac? I installed BL touch and I need to update the firmware for this. When I try to update firmware in Cura to the printer it doesn’t make a connection to the printer over USB
How do I update the firmware from Cura on a Mac? I installed BL touch and I need to update the firmware for this. When I try to update firmware in Cura to the printer it doesn’t make a connection to the printer over USB
Luciano Mancusi Coelho
Good afternoon!
In double mode, the purge towers automatically generated by the slicer, have several beds in white leaving the rest of the tower floating, how can I solve this?
Thanks!
Good afternoon!
In double mode, the purge towers automatically generated by the slicer, have several beds in white leaving the rest of the tower floating, how can I solve this?
Thanks!
Wolfgang Brunnthaler
ist für den Drucker auch eine deutsche SW und Bedienungsanleitung verfügbar?
ist für den Drucker auch eine deutsche SW und Bedienungsanleitung verfügbar?
Sean Franklin
The “how to get slicing software for macOS” could use some work. The download file is a .rar, which macOS doesn’t recognize so download something from the App Store like “The Unarchiver” to get that. The video link is broken, but presumably it’s the same as the .MP4 file in the download… but that file shows Windows, not Mac. So: On a Mac, open the Finder and Command-Shift-G, and enter path ~/Library/Application Support/cura/{version} – my version is 5.2 but that’ll change of course. In there, are the “definitions” and “extruders” folders for the definition & extruder files from the download.
The “how to get slicing software for macOS” could use some work. The download file is a .rar, which macOS doesn’t recognize so download something from the App Store like “The Unarchiver” to get that. The video link is broken, but presumably it’s the same as the .MP4 file in the download… but that file shows Windows, not Mac. So: On a Mac, open the Finder and Command-Shift-G, and enter path ~/Library/Application Support/cura/{version} – my version is 5.2 but that’ll change of course. In there, are the “definitions” and “extruders” folders for the definition & extruder files from the download.
Cameron
Sovol is horrible for technical support. I am seriously considering sending mine back because of how poor their support is.
Sovol is horrible for technical support. I am seriously considering sending mine back because of how poor their support is.
Allen
I had a print collide with the print head and tear the part cooling fan shroud off. I have searched and can not find a replacement. Where can I get a replacement for the SV04, it was the left one and it was 3D printed.
I had a print collide with the print head and tear the part cooling fan shroud off. I have searched and can not find a replacement. Where can I get a replacement for the SV04, it was the left one and it was 3D printed.
Robert L Fox Sr
were can i get the newest firmwear for solvo 4
thank you
were can i get the newest firmwear for solvo 4
thank you
Aska
Issues with axis positioning after power out. position measurement are way off compare to move tool display, especial with my second IDEX. when I switch from 1 IDEX to 2 IDEX for auto leveling it moved to the side in stead of middle, that casing the motor made a very loud stepping noise and froze the touch screen with warning “Auto-Home failed! The printer needs to be reset. Tips: check stepper motors and end stops for any disconnection or damages.”
Issues with axis positioning after power out. position measurement are way off compare to move tool display, especial with my second IDEX. when I switch from 1 IDEX to 2 IDEX for auto leveling it moved to the side in stead of middle, that casing the motor made a very loud stepping noise and froze the touch screen with warning “Auto-Home failed! The printer needs to be reset. Tips: check stepper motors and end stops for any disconnection or damages.”
Austin
Can someone explain how to fix my SV04 Z-Axis problem, for some reason the Z-Axis goes up but won’t go down, I’ve tried leveling the bed and doing a firmware flash and it hasn’t resolved the issue.
Can someone explain how to fix my SV04 Z-Axis problem, for some reason the Z-Axis goes up but won’t go down, I’ve tried leveling the bed and doing a firmware flash and it hasn’t resolved the issue.
robert piotrowski
Can someone verify which way the SV04 air flow should be on the extruder fan? towards the extruder radiator? or away?
Can someone verify which way the SV04 air flow should be on the extruder fan? towards the extruder radiator? or away?
John
your video link for leveling the hotbed is set to private. That is not helpful
your video link for leveling the hotbed is set to private. That is not helpful
Kevin
How about the printheads moving really slow randomly? During bed leveling, when changing menus, the motors and bed move super slow to beginning position then are fast. During dual mode, sometimes the resting printhead comes out from resting position very slow before getting to the part, then prints fine. This is adding up my print times.
How about the printheads moving really slow randomly? During bed leveling, when changing menus, the motors and bed move super slow to beginning position then are fast. During dual mode, sometimes the resting printhead comes out from resting position very slow before getting to the part, then prints fine. This is adding up my print times.