


Struggling with 3d print not sticking to bed? You’re not alone. Poor 3d printing bed adhesion can ruin your prints and waste time. Achieving correct adhesion is the key to a smooth first layer and a successful print. This guide will help you tackle bed adhesion problems and make your print bed work flawlessly.
Key Takeaways
- Make sure your print bed is flat. This helps the nozzle touch the surface evenly. A flat bed stops warping and sticks prints better.
- Change the Z-offset to get the right nozzle height. This small adjustment is important for different filament types.
- Clean your print bed often. Use rubbing alcohol to wipe away dust and oils that stop sticking.
Make Sure Your 3D Print Sticks with Bed Leveling
Why leveling your bed is important for 3D printing
Leveling the bed is a key step for good adhesion. If the bed isn’t flat, the nozzle might be too close or far. This can make the first layer stick unevenly, causing warping or failed prints. A leveled bed helps the filament stick evenly to the surface.
Here’s why leveling matters:
- A flat bed helps the first layer stick better and avoids warping.
- It stops mistakes caused by bad nozzle-to-bed contact.
- Squishing the first layer too much wastes material and ruins prints.
Taking time to level the bed helps your prints succeed.
Ways to level your bed for better sticking
You can level your bed by hand or use an automatic system. Here’s how both work:
|
Leveling Type |
How It Works |
|---|---|
|
Manual Leveling |
Move the nozzle to each corner. Adjust knobs until paper fits snugly between the nozzle and bed. |
|
Auto Bed Leveling |
Sensors check the bed in a grid. The printer adjusts for uneven spots. |
|
Z Offset |
Change the nozzle’s height to improve how the first layer sticks. |
Some Sovol 3D printers have auto leveling, which makes it faster and easier. Whether you level by hand or automatically, always check your settings before printing. A leveled bed stops the problem of prints not sticking.
Fine-Tune Z-Offset for First Layer Adhesion
Understanding Z-offset and its role in how to make a filament stick to the build plate
The Z-offset is the distance between the nozzle and the print bed when printing the first layer. Getting this distance just right is crucial for proper bed adhesion. If the nozzle is too far from the bed, the filament won’t stick, leading to issues like warping or the dreaded 3d print not sticking to bed. On the other hand, if the nozzle is too close, the filament can get squished, causing uneven layers or even clogging the nozzle.
Adjusting the Z-offset helps you fine-tune this nozzle-to-bed distance. It’s especially useful when you’ve added a new build surface, like a PEI sheet, or when switching between filament types. For example, PLA often needs to be slightly squished onto the bed for good adhesion, while PETG requires a bit more space to avoid sticking too much. By optimizing the Z-offset, you ensure consistent heat distribution and better first layer adhesion.
Steps to adjust Z-offset for optimal first layer adhesion
Here’s how you can adjust the Z-offset to improve your 3d printing bed adhesion:
- Start with a leveled bed: Make sure your print bed is properly leveled before adjusting the Z-offset. This ensures a consistent baseline.
- Access the Z-offset settings: Most 3D printers, including Sovol models, allow you to adjust the Z-offset through the control panel or software.
- Test the first layer: Print a small test pattern, like a square or line. Observe how the filament sticks to the bed.
- Make small adjustments: If the filament isn’t sticking, lower the Z-offset slightly. If it’s too squished, raise it. Adjust in small increments (e.g., 0.05mm) until you get a smooth, even layer.
- Check for material-specific needs: Different filaments may require unique Z-offset settings. For instance, PLA sticks well when slightly pressed, while PETG benefits from a bit more height.
Fine-tuning the Z-offset might take a few tries, but it’s worth the effort. Once dialed in, you’ll notice a significant improvement in how your first layer adheres to the print bed.
Clean the Build Plate for Better Bed Adhesion
Things that make your 3D prints not stick
A dirty bed can mess up your prints. Dust, grease, and old filament bits are common problems. Even touching the bed can leave oils that stop sticking. Over time, these things pile up and make printing harder.
Some cleaners can also cause trouble. For example, dish soap might leave a layer that blocks adhesion. If your first layer is peeling or lifting, it’s time to clean. A clean bed helps the filament stick better and improves print quality.
Easy ways to clean your print bed
Cleaning your bed is simple. Use isopropyl alcohol (IPA) and a cloth. Wipe the bed to remove grease, oils, and dirt. For tough spots, let the IPA sit for a minute before wiping. This works well for glass and PEI beds.
If you like water-based cleaning, use distilled water with soap. Scrub gently, rinse with hot water, and dry completely. Always test the first layer after cleaning to check for dirt.
A clean bed makes a big difference in sticking. Whether using PLA, ABS, or PETG, a spotless surface helps. Sovol 3D printers have great beds that are easy to clean and use.
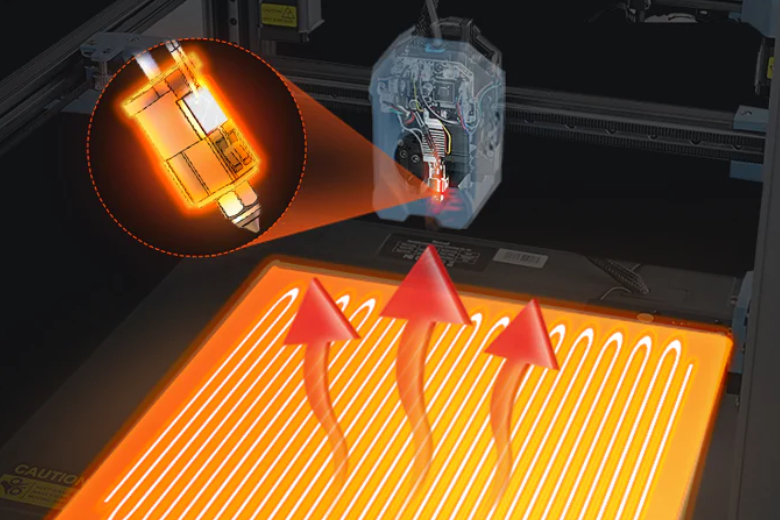
Adjust Bed Temperature for Better 3D Printing Adhesion
Why bed temperature matters for different filaments
The bed's heat helps your filament stick properly. Different materials need different temperatures to avoid problems like warping or prints not sticking. For example, PLA needs medium heat to stay in place. ABS requires higher heat to stop curling. PETG works best with a hotter bed for strong sticking without overdoing it.
The print surface also affects temperature needs. Glass beds often need more heat for good sticking. PEI sheets work well with slightly lower heat. If your printer is in a cold room, raise the bed temperature to make up for heat loss. Here’s a simple guide on how surfaces and heat affect sticking:
|
Bed Surface |
Best Temperature Range |
How It Helps Adhesion |
|---|---|---|
|
Glass |
Sticks well, reduces warping |
|
|
PEI |
70 °C to 80 °C |
Good sticking at lower heat |
|
Ambient |
Changes with room temp |
Adjust for heat loss or softening |
Best temperatures for PLA, ABS, and PETG
Each filament type has a perfect temperature range for sticking. Using the right heat improves print quality. PLA sticks well at lower heat, while ABS and PETG need more warmth. Use this table to find the best temperature for your filament:
|
Filament Type |
Best Bed Temperature |
Room Temperature Range |
|---|---|---|
|
PLA |
60°C |
~22°C (cool) |
|
PETG |
20-40°C |
|
|
ABS |
40-50°C |
N/A |
Start with these temperatures and adjust if needed. If the first layer peels or lifts, increase the heat a little. Sovol 3D printers make it easy to change these settings, helping you get great adhesion every time.
Use Adhesives to Help Filament Stick to the Build Plate
Types of adhesives like glue sticks, hairspray, and specialized products
Adhesives can really help with bed adhesion. They add a sticky layer that helps the filament stick better to the bed. This is especially useful for tricky materials like ABS and polycarbonate. These materials often warp or curl, but adhesives can stop that. They also reduce print failures and save filament.
Here are some common adhesive options:
- Glue sticks: Cheap and simple to use. They work well with PLA and ABS.
- Hairspray: A fast solution for sticking problems. Use strong-hold brands without scents.
- Specialized products: Products like Magigoo are made for 3D printing. They stick well and clean up easily.
Adhesives work best for small prints. For big prints, applying them by hand can take too long and may not be even.
How to use adhesives properly for better 3D printing bed adhesion
Using adhesives the right way is very important. Follow these steps to prepare your print bed:
- Apply a thin, even layer: Use glue or spray to cover the bed evenly. Avoid thick spots or streaks.
- Let it dry or get sticky: Wait a bit before printing. This helps the filament stick better.
- Clean the bed often: Adhesive build-up can cause problems. Wipe the bed to keep it smooth.
Adhesives are a simple way to fix a 3D print not sticking to bed. They help the first layer stick better and improve your print quality.
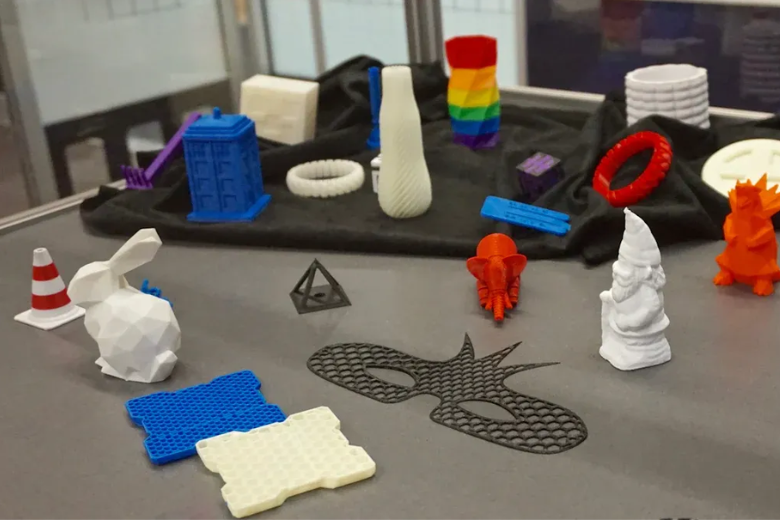
Pick the Best Build Surface for First Layer Sticking
Different build surfaces like glass, PEI, and magnetic sheets
The surface you print on affects how well your filament sticks. Each type has its own benefits. Knowing these can help you choose the best one. Here’s a simple guide to popular surfaces:
- Glass: Glass is very flat and gives smooth prints. It’s easy to clean and works well with glue sticks. But, it heats up slower than other surfaces.
- PEI (Polyetherimide): PEI sheets stick well when warm and release prints when cool. They last long and need little care. However, some filaments may stick too much if the heat is too high.
- Magnetic Sheets: These flexible sheets make removing prints easy by bending them. They stick well, like glass with glue, but may not handle high heat or uneven warming.
Each surface has pros and cons. Pick one based on your filament and printing needs.
Tips for choosing the right surface for your filament and printer
Choosing the right surface isn’t just about liking it—it’s about what works best. Here’s how to decide:
- Match surface to filament: PLA sticks well to glass with glue. ABS works better with PEI’s strong grip. PETG pairs nicely with PEI but needs careful heat control to avoid sticking too much.
- Check your printer’s features: See if your printer supports surfaces like magnetic sheets or PEI. Some printers, like Sovol 3D models, come with plates that work with many materials.
- Think about care: If you want less upkeep, PEI is a good pick. For shiny prints, glass is better. Magnetic sheets are great if you want easy print removal.
Pro Tip: Clean your surface with isopropyl alcohol often. This removes dirt and oils, helping your filament stick better. A clean surface reduces problems like prints not sticking.
By picking the right surface and keeping it clean, you’ll get better prints and fewer problems.
Adjust First Layer Settings for Better Bed Adhesion
Changing first-layer speed and extrusion width
The first layer is the base of your print. Adjusting its settings can improve sticking. First, slow down the first-layer speed. Printing slower helps the filament stick better to the bed. Try a speed of 20-30 mm/s for most materials. This small change can fix problems like prints not sticking.
Next, increase the extrusion width slightly. Set it to about 120% of the nozzle size. This makes the first layer thicker and fills gaps better. For example, with a 0.4mm nozzle, set the width to 0.48mm. This helps tricky filaments, like PETG, stick more easily.
Also, try adjusting the first-layer height. A thicker first layer, like 0.2mm instead of 0.1mm, can fix small leveling mistakes. These changes work together to make a strong base for your print.
Using slicer tools to improve first layer sticking
Your slicer software can help with adhesion. Use features like brims, rafts, or skirts. A brim adds extra lines around your model, increasing contact with the bed. Set the brim width to 5-8mm for better results. For small models, a raft can stop warping and add stability.
Other slicer settings can also help. Increase the extrusion multiplier for the first layer to make it thicker and stickier. Slow down the first-layer speed in the slicer if you haven’t already. Make sure the bed temperature matches your filament’s needs. Warmer beds often need fewer brims or rafts.
Lastly, check the adhesion type in your slicer. Choose "Brim" or "Raft" to apply these features correctly. These slicer changes, along with a clean bed, can greatly improve how well your print sticks.
Fixing 3D printing bed adhesion problems is key to getting great results. When your first layer sticks well, your prints look better and last longer. Try out the seven solutions shared here. Adjust your print bed, clean it, or tweak slicer settings to find what works best for you. Sovol 3D printers make this process easier with features like auto bed leveling and reliable build surfaces. They’re built to help you achieve perfect first layers every time.
FAQ
Why won’t my 3D print stick to the bed even after leveling?
Your bed might still have dust, grease, or residue. Clean it with isopropyl alcohol. Also, check your Z-offset and ensure the nozzle isn’t too far.
Can I use regular glue instead of a glue stick for adhesion?
Yes, but stick to water-soluble glue. Apply a thin, even layer and let it dry slightly before printing. Avoid adhesives that leave residue or damage surfaces.
How do I know if my first layer settings are correct?
Look for a smooth, even layer without gaps or squishing. If it peels or lifts, adjust your Z-offset, slow the speed, or increase extrusion width slightly.
Pro Tip: Always test with a small print before starting larger projects to save time and material.


發表評論
在發布之前,所有評論都會進行調節。
此網站已受到 hCaptcha 保護,且適用 hCaptcha 隱私政策以及服務條款。