When you customize OrcaSlicer settings, you unlock the true potential of your Sovol printer. Careful adjustments can drastically improve print quality, delivering smoother surfaces and reducing common errors. By fine-tuning these parameters, you achieve consistent results that elevate your 3D printing projects. Whether you aim for intricate details or flawless finishes, optimized settings make a noticeable difference. With the right approach, you can transform your printer into a tool that produces professional-grade outputs.
Key Takeaways
- Adjust layer height and print speed for detail and time. Start with tests to find the best settings for your prints.
- Change retraction settings to reduce stringing and oozing. Use a test model to see how changes affect print quality.
- Turn on Z-hop to stop nozzle crashes during moves. This is important for detailed designs and keeps prints looking good.
- Set temperature and cooling for each filament type. Use tests to find the best extruder temperature for strong prints.
- Try different infill patterns and densities for strength and saving material. Pick the right mix based on what your model needs.
Key Settings in OrcaSlicer

Fine-tuning the settings in OrcaSlicer can significantly enhance your 3D printing experience. By understanding and adjusting key parameters like layer height, retraction, and Z-hop, you can achieve optimal print quality and reduce common issues. Below, we’ll explore these essential settings in detail.
Layer Height and Print Speed
Layer height and print speed are two of the most critical factors influencing the quality of your prints. Layer height determines the thickness of each printed layer, directly affecting surface smoothness and detail resolution. A smaller layer height, such as 0.1 mm, produces finer details but increases print time. Conversely, a larger layer height, like 0.2 mm, speeds up the process but sacrifices some detail.
Print speed, on the other hand, controls how fast the printer moves while extruding filament. Slower speeds, typically around 40-60 mm/s, allow for better adhesion and precision, especially for intricate models. Faster speeds, such as 80-100 mm/s, are suitable for simpler designs but may compromise accuracy.
Tip: Start with calibration test to find the balance between layer height and print speed that works best for your project. Adjust these settings incrementally to observe their impact on your prints.
Retraction Settings in Orca Slicer
Retraction settings play a vital role in minimizing stringing and oozing during non-print moves. Retraction pulls filament back into the nozzle, preventing excess material from leaking out. In OrcaSlicer, you can adjust both retraction distance and speed to suit your filament type and model complexity.
For most Sovol printers, a retraction distance of 2-7 mm and a speed of 20-100 mm/s works well. However, to minimize stringing, aim for a distance of 1-2 mm and a speed of 20-45 mm/s. These values reduce the risk of filament dragging across the print, ensuring cleaner results.
Pro Tip: Use a retraction test model to fine-tune these settings. Make one adjustment at a time to isolate its effect on stringing and oozing.
Z-Hop in Orca Slicer
Z-hop is an essential feature in Orca Slicer that lifts the nozzle during travel moves. This prevents the nozzle from scraping against already printed layers, which can cause surface imperfections or damage delicate details. Activating Z-hop is especially beneficial for complex models with sharp overhangs or intricate features.
When configuring Z-hop height, start with a small value, such as 0.2-0.4 mm. This ensures the nozzle lifts just enough to avoid collisions without unnecessarily increasing print time. By preventing scratches and smudges, Z-hop enhances the overall quality of your prints.
- Why It Matters: Z-hop reduces the risk of nozzle collisions, which can lead to layer shifts or damaged prints. For intricate designs, this setting is indispensable.
Note: Always test Z-hop settings with a calibration model to ensure they align with your printer’s capabilities and the specific requirements of your project.
Temperature and Cooling Adjustments
Temperature and cooling settings play a pivotal role in achieving high-quality prints with your Sovol 3D printer. Proper temperature calibration ensures optimal filament flow, while effective cooling solidifies layers correctly, preventing warping or deformation.
Extruder Temperature
The extruder temperature directly affects how the filament melts and adheres to the print bed. For PLA, a common starting point is 190-210°C, while PETG typically requires 230-250°C. Always refer to the filament manufacturer’s recommendations, but don’t hesitate to fine-tune the temperature in small increments (e.g., 5°C) to achieve the best results. If you notice under-extrusion or weak layer adhesion, slightly increasing the temperature can help. Conversely, if you see stringing or oozing, lowering the temperature might resolve the issue.
Cooling Fan Speed
Cooling fan speed determines how quickly the filament solidifies after extrusion. For PLA, a fan speed of 100% is often ideal, as it cools the material quickly and prevents sagging on overhangs. PETG, however, benefits from lower fan speeds (30-50%) to maintain better layer adhesion. Models with intricate details or sharp overhangs may require higher cooling to preserve their structure.
Tip: Use a temperature tower test to identify the optimal extruder temperature for your filament. Similarly, experiment with fan speed settings to find the balance between adhesion and cooling.
Avoiding Overheating
Overheating can cause issues like blobs, stringing, or even layer shifts. To prevent this, ensure your cooling system is functioning properly. For larger prints, consider enabling a cooling delay between layers to allow sufficient time for solidification.
By mastering temperature and cooling adjustments, you can significantly enhance the quality of your prints and reduce common 3D printing issues.
Infill Patterns and Density
Infill patterns and density settings influence the strength, weight, and material usage of your 3D prints. Choosing the right combination ensures your model meets its functional and aesthetic requirements.
Infill Patterns
Orca Slicer offers a variety of infill patterns, such as grid, honeycomb, and gyroid. Each pattern has unique characteristics. For example:
- Grid: Provides a balance between strength and print speed, making it suitable for general-purpose models.
- Honeycomb: Offers excellent strength-to-weight ratio, ideal for structural parts.
- Gyroid: Distributes stress evenly, making it perfect for flexible or load-bearing designs.
Selecting the right pattern depends on your model’s purpose. For decorative prints, simpler patterns like lines or grid work well. For functional parts, honeycomb or gyroid ensures durability.
Infill Density
Infill density determines how much material fills the interior of your model. A lower density (10-20%) reduces material usage and print time, making it ideal for lightweight or aesthetic models. Higher densities (50-100%) increase strength and durability, suitable for mechanical parts or load-bearing components.
- Research highlights the impact of infill density on mechanical performance. Forés-Garriga et al. demonstrated that infill configuration directly affects the strength and weight of 3D-printed parts. Finite element analysis (FEA) further supports the importance of optimizing infill density for structural integrity and material efficiency.
Pro Tip: Use a slicer preview to visualize how different infill patterns and densities will look inside your model. This helps you make informed decisions before printing.
By understanding and adjusting infill patterns and density, you can optimize your prints for strength, weight, and material efficiency, ensuring they meet your specific needs.
Step-by-Step Optimization for Sovol Printers
Adjusting Layer Height for Surface Quality
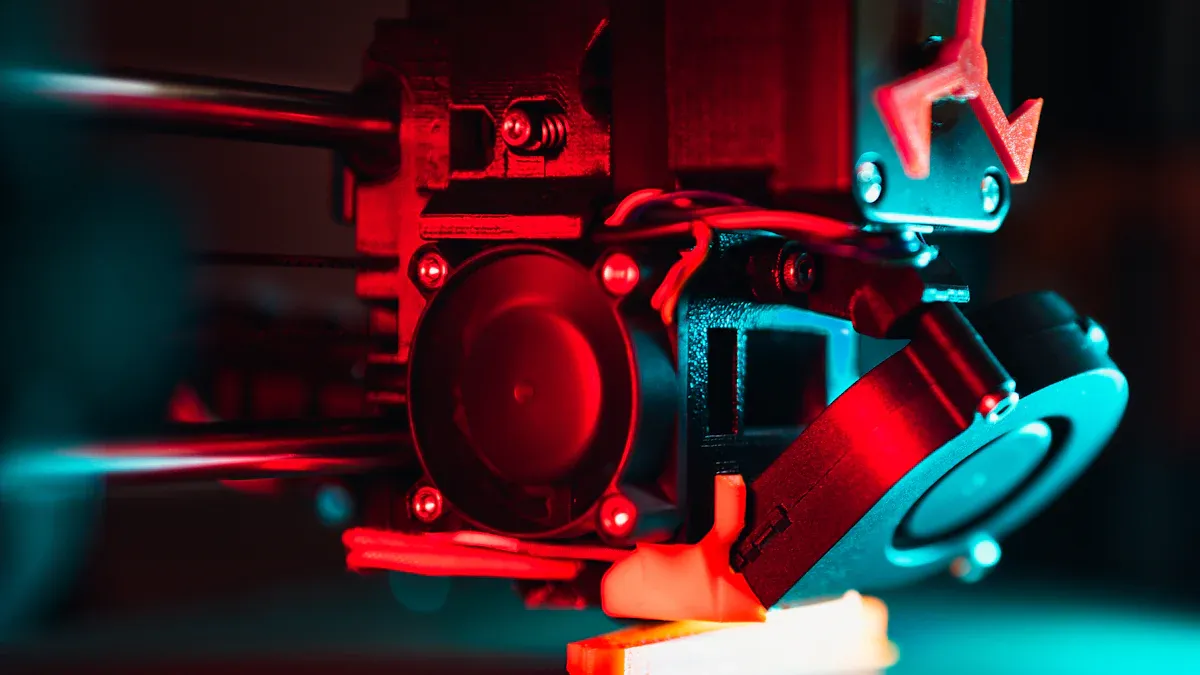
Layer height is a critical factor in achieving optimal surface quality for your 3D prints. By adjusting this setting in OrcaSlicer, you can control the level of detail and smoothness in your models. Thinner layers, such as 0.1 mm, produce sharper details and smoother surfaces, making them ideal for intricate designs. However, they also increase production time. Larger layers, like 0.2 mm, maintain decent quality while significantly reducing print time.
| Layer Height (microns) | Surface Quality | Production Time Impact |
|---|---|---|
| Thinner layers | Sharper details, smoother surfaces | Longer production time |
| Larger layers (100) | Maintains quality | Cuts production time by up to 3x |
To find the best layer height for your project, perform a calibration test. This allows you to balance surface quality and production time effectively.
Fine-Tuning Retraction to Minimize Stringing
Stringing occurs when excess filament leaks during non-print moves, leaving thin strands on your model. Fine-tuning retraction settings in Orca Slicer can help you eliminate this issue. Start by adjusting the retraction distance and speed. For example:
- Set retraction to 1.6 mm with 0.4 mm Z-hop and enable "wipe while retracting" to reduce stringing.
- Increase the retraction value to 4 mm for cleaner prints.
- Experiment with 3 mm retraction, which has been shown to completely resolve stringing in some cases.
Use a retraction test model to identify the optimal settings for your filament and Sovol 3D printer. This ensures cleaner prints with fewer imperfections.
Setting Z-Hop to Prevent Collisions
Z-hop in Orca Slicer is a valuable feature that prevents nozzle collisions by lifting the print head during non-print moves. This setting is especially useful for models with delicate details or sharp overhangs.
| Test Method | Description |
|---|---|
| Z Hop Test | Evaluates Z-hop settings to prevent collisions, reduce layer shifts, and protect prints. |
To enable Z-hop, adjust the Z-hop height to 0.2-0.4 mm. This small lift prevents nozzle drags without significantly increasing print time. Additionally:
- Activate the Z-hop feature in your slicer settings.
- Test the configuration with a calibration model to ensure smooth movements and collision-free printing.
By optimizing Z-hop, you can protect your prints and achieve higher-quality results.
Optimizing Print Speed for Material Types
Print speed is a critical factor in achieving high-quality results with your 3D printer. Adjusting this setting in OrcaSlicer allows you to tailor the printing process to the specific material you are using. Different materials respond differently to speed adjustments, so finding the optimal balance is essential for precision and durability.
For Polylactic Acid (PLA), a print speed of 50 mm/s often delivers the best results. This speed minimizes dimensional errors and enhances detail resolution. Materials like PETG or ABS, which require higher extrusion temperatures, may benefit from slightly slower speeds, such as 40-45 mm/s. Slower speeds allow the filament to adhere properly and prevent issues like warping or layer separation.
Tip: Always perform a calibration test when switching materials. This helps you identify the ideal print speed for your specific filament and model.
A study highlights that print speed significantly influences the precision of 3D printed objects. It found that a speed of 50 mm/s, combined with appropriate layer height and infill density, minimizes dimensional errors. This demonstrates the importance of fine-tuning speed settings for different materials to achieve optimal results.
When adjusting print speed, consider the complexity of your model. Intricate designs with fine details may require slower speeds to ensure accuracy. Simpler models can handle faster speeds, reducing print time without compromising quality. By understanding how speed impacts different materials, you can enhance the performance of your Sovol 3D printer and achieve consistent, high-quality prints.
Calibrating Temperature for Different Filaments
Temperature calibration is essential for achieving reliable and high-quality prints with your Sovol printer. Each filament type has a specific temperature range that ensures proper melting, adhesion, and layer bonding. Adjusting the extruder temperature in Orca Slicer allows you to optimize the printing process for different materials.
PLA, one of the most commonly used filaments, typically requires an extruder temperature between 190°C and 210°C. PETG, known for its strength and flexibility, performs best at 230°C to 250°C. ABS, a durable material often used for functional parts, requires even higher temperatures, ranging from 240°C to 260°C. Always refer to the filament manufacturer’s recommendations as a starting point.
Pro Tip : Use a temperature tower test to identify the optimal temperature for your filament. This test involves printing a model with varying temperature zones, allowing you to observe how each setting affects the print quality.
Cooling also plays a vital role in temperature calibration. PLA benefits from high cooling fan speeds (around 100%) to solidify layers quickly and prevent sagging. PETG and ABS, however, require lower fan speeds to maintain proper adhesion and avoid cracking. Adjusting these settings in your slicer ensures that each filament performs at its best.
By calibrating temperature and cooling settings for each filament, you can reduce common issues like stringing, warping, and weak layer adhesion. This step is crucial for achieving consistent results and maximizing the potential of your Sovol 3D printer.
Troubleshooting OrcaSlicer Issues
Even with optimized settings, you may encounter common printing issues. Troubleshooting these problems ensures your Sovol 3D printer consistently delivers high-quality results. Below, we’ll address some frequent challenges and their solutions.
Resolving Stringing and Oozing
Stringing and oozing occur when excess filament leaks during non-print moves, leaving thin strands or blobs on your model. These issues often stem from improper retraction settings or incorrect extruder temperature.
To minimize stringing, start by fine-tuning the retraction settings in your slicer. Increase the retraction distance slightly, ensuring the filament retracts far enough to prevent leakage. For Sovol printers, a retraction distance of 2-4 mm and a speed of 20-45 mm/s works well for most filaments. Additionally, enable "wipe while retracting" in Orca Slicer to clean the nozzle during retraction.
Temperature adjustments also play a crucial role. Lowering the extruder temperature by 5-10°C can reduce filament viscosity, minimizing oozing. However, avoid setting the temperature too low, as this may cause under-extrusion.
Tip: Use a stringing test model to evaluate the effectiveness of your adjustments. This allows you to identify the optimal combination of retraction and temperature settings for your filament.
Fixing Warping and Adhesion Problems
Warping and poor bed adhesion are common challenges, especially when printing larger models or using materials like ABS. Warping occurs when the edges of a print lift off the bed, leading to distorted shapes. Adhesion problems prevent the first layer from sticking properly, causing the print to fail.
To combat warping, ensure your print bed is level and clean. Use a high-quality adhesive, such as a glue stick or painter’s tape, to improve bed adhesion. For materials prone to warping, like ABS, consider using a heated bed set to 90-110°C. PLA typically adheres well at 50-60°C.
Adjusting the first layer height in Orca Slicer can also enhance adhesion. A slightly lower first layer height increases the contact area between the filament and the bed, improving stickiness. Additionally, enabling a brim or raft in your slicer settings provides extra support for the edges of your model, reducing the risk of warping.
Pro Tip: Use an enclosure for your 3D printer to maintain a stable temperature during printing. This minimizes temperature fluctuations, which are a primary cause of warping.
Addressing Layer Shifts and Extrusion Inconsistencies
Layer shifts and extrusion inconsistencies can ruin an otherwise perfect print. Layer shifts occur when the print head moves out of alignment, causing layers to misalign. Extrusion inconsistencies result in uneven surfaces or weak spots in your model.
To resolve layer shifts, check the belts and pulleys on your Sovol printer. Loose belts can cause the print head to slip during movement. Tighten the belts and ensure the pulleys are secure. Additionally, reduce the print speed in Orca Slicer. Slower speeds reduce the likelihood of sudden movements that can lead to misalignment.
Extrusion inconsistencies often arise from clogged nozzles or fluctuating filament flow. Clean the nozzle regularly to remove any blockages. Use a weighing scale to measure filament weight before and after a test print. This helps you monitor extrusion consistency. For detailed inspection, use an optical magnifier to analyze layer transitions and surface quality.
| Method | Purpose | How to Use | Recommended Calibration Checks |
|---|---|---|---|
| Weighing Scale | Measures filament weight before and after a test print to monitor consistency. | Weigh filament before and after printing to check extrusion rate. | Useful for analyzing discrepancies in expected vs actual print weights. |
| Optical Magnifier/Microscope | Analyzes layer lines and surface quality at a microscopic level. | Use to inspect details of layer transitions and surface texture. | Ideal for close-up inspection of fine detail prints and surface smoothness. |
Note: Regular maintenance of your 3D printer, including lubrication of moving parts, ensures smooth operation and reduces the risk of layer shifts and extrusion issues.
By addressing these common problems, you can enhance the reliability and quality of your Sovol 3D printer. Troubleshooting may take time, but the results are well worth the effort.
Managing Overheating and Cooling Challenges
Overheating and cooling issues can significantly impact the quality of your 3D prints. These challenges often lead to defects such as blobs, stringing, or deformed layers. Understanding how to manage these problems ensures your Sovol 3D printer produces consistent, high-quality results.
Identifying Overheating Symptoms
Overheating typically manifests as visible defects on your prints. Common signs include:
- Blobs or Bulges: Excess filament accumulates on the surface due to slow cooling.
- Stringing: Thin strands of filament stretch between parts of the model.
- Layer Deformation: Warped or sagging layers occur when the filament remains too hot for too long.
If you notice these issues, your printer's cooling system or temperature settings may need adjustment.
Optimizing Cooling Settings in OrcaSlicer
Cooling plays a crucial role in solidifying each layer of your print. In OrcaSlicer, you can fine-tune cooling fan speeds to match the filament type and model complexity. For PLA, set the fan speed to 100% for rapid cooling. PETG and ABS require lower speeds, typically 30-50%, to maintain proper adhesion.
Tip: Use a cooling tower test to evaluate the effectiveness of different fan speeds. This test helps you identify the optimal cooling settings for your filament.
Adjusting Print Temperature
The extruder temperature directly affects filament flow and adhesion. High temperatures can cause overheating, while low temperatures may lead to under-extrusion. For PLA, start with a temperature range of 190-210°C. PETG and ABS require higher ranges, such as 230-250°C and 240-260°C, respectively. Adjust the temperature in small increments (e.g., 5°C) to find the ideal setting.
Leveraging Z-Hop in OrcaSlicer
Z-hop in OrcaSlicer can help manage overheating by reducing nozzle contact with the print surface. This feature lifts the nozzle during travel moves, preventing heat buildup on delicate areas. Set the Z-hop height to 0.2-0.4 mm for optimal results.
Why It Matters: Z-hop minimizes the risk of heat-related defects, such as smudges or layer shifts, by reducing direct contact between the nozzle and the model.
Preventing Overheating with Retraction Settings
Improper retraction settings can exacerbate overheating issues. Excess filament left in the nozzle may ooze out, causing blobs or stringing. Adjust the retraction distance and speed in OrcaSlicer to prevent this. For Sovol printers, a retraction distance of 2-4 mm and a speed of 20-45 mm/s works well for most filaments.
Maintaining Your Printer's Cooling System
Regular maintenance ensures your printer's cooling system functions effectively. Clean the cooling fan and vents to remove dust or debris. Check for any loose connections or worn-out components. A well-maintained cooling system prevents overheating and extends the lifespan of your 3D printer.
Testing and Iterating
Every filament and model presents unique challenges. Perform calibration tests, such as temperature towers and cooling towers, to fine-tune your settings. Iterative testing helps you achieve the best results for your specific project.
By managing overheating and cooling challenges effectively, you can enhance the quality of your prints and reduce common defects. OrcaSlicer provides the tools you need to optimize these settings, ensuring your Sovol 3D printer performs at its best.
Advanced Tips for Orca Slicer Users
Customizing Start and End G-Code
Customizing the start and end G-code in Orca Slicer allows you to optimize your 3D printer's behavior before and after each print. Start G-code commands prepare the printer for the task, ensuring proper nozzle heating, bed leveling, and filament priming. End G-code commands finalize the process by retracting the filament, cooling the nozzle, and moving the print head to a safe position.
To customize these codes, navigate to the printer settings in Orca Slicer. Add commands tailored to your specific needs. For example, include a nozzle wipe command in the start G-code to prevent filament residue from affecting the first layer. In the end G-code, add a fan shutdown command to conserve energy after the print completes.
Tip: Use a calibration model to test your customized G-code. This ensures the commands execute correctly and improve the overall printing process.
Using Adaptive Layer Heights for Complex Models
Adaptive layer heights in Orca Slicer enhance the quality of complex models by varying layer thickness based on the geometry. Thinner layers are applied to areas with intricate details, while thicker layers are used for simpler sections. This approach reduces print time without compromising precision.
Enable adaptive layer heights in the slicer settings. Set a minimum layer height for fine details and a maximum layer height for faster printing. For example, use 0.1 mm for detailed sections and 0.3 mm for bulkier areas. This adjustment ensures your 3D printer produces models with sharp features and smooth transitions.
Why It Matters: Adaptive layer heights balance speed and quality, making them ideal for models with varying levels of complexity.
Leveraging OrcaSlicer Profiles for Filament Types
OrcaSlicer profiles simplify the process of optimizing settings for different filament types. These profiles include pre-configured parameters such as temperature, retraction, and cooling settings, tailored to specific materials. Using the right profile ensures your 3D printer performs efficiently and produces high-quality prints.
For PLA, select a profile with an extruder temperature of 190-210°C and a fan speed of 100%. PETG profiles typically feature higher temperatures (230-250°C) and reduced cooling speeds (30-50%). ABS profiles prioritize adhesion with heated bed settings of 90-110°C. Perform tests like temperature towers, retraction tests, and overhang evaluations to refine these profiles further.
-
Key Benefits:
- Temperature towers identify the best nozzle temperature for adhesion and surface quality.
- Retraction tests minimize stringing during non-print moves.
- Overhang and bridging tests ensure clean edges and prevent sagging.
Pro Tip: Save custom profiles for each filament type. This streamlines future projects and ensures consistent results across different materials.
Experimenting with Advanced Infill Patterns
Experimenting with advanced infill patterns in Orca Slicer can significantly enhance the strength, weight, and material efficiency of your 3D prints. These patterns determine the internal structure of your model, directly influencing its durability and performance. By selecting the right infill type and density, you can optimize your 3D printer's output for both functional and aesthetic purposes.
Advanced infill patterns, such as Adaptive Cubic, offer unique benefits. This pattern refines the internal structure by dividing it into smaller, more precise cells. It increases the model's integrity and toughness while stabilizing extrusion flow. For projects requiring high strength, Adaptive Cubic is an excellent choice. Additionally, it optimizes density, ensuring a balance between material usage and structural stability.
| Infill Type | Description | Benefits |
|---|---|---|
| Adaptive Cubic | Refines cells of an octree containing object triangles. | Increases model integrity and toughness, stabilizes extrusion flow, and optimizes density. |
| Density Settings | Best density setting is 10-20%. | Balances strength, print reliability, print time, and material consumption. |
When adjusting infill density, aim for 10-20%. This range provides sufficient strength for most models while minimizing material consumption and print time. Higher densities may be necessary for load-bearing parts, but they increase weight and extend printing duration. Use the slicer's preview feature to visualize how the infill will look inside your model before printing.
By experimenting with advanced infill patterns and density settings, you can tailor your prints to meet specific requirements. Whether you're creating decorative pieces or functional components, these adjustments ensure your 3D printer delivers optimal results.
Mastering Sovol printer settings with OrcaSlicer requires attention to detail and a willingness to experiment. Key adjustments, such as Z-hop, retraction, and temperature, play a pivotal role in improving print quality. These settings ensure smoother surfaces, cleaner details, and fewer errors.
To achieve optimal results, you should embrace an iterative approach:
- Test small calibration models, like temperature towers or retraction tests, to fine-tune specific parameters.
- Make one adjustment at a time to isolate its impact on print quality.
- Use benchmarks, such as overhang tests, to identify areas for improvement.
Patience and persistence are essential. Each adjustment brings you closer to producing professional-grade prints. With time and practice, you’ll unlock the full potential of your Sovol printer.
FAQ
What is the best way to start optimizing OrcaSlicer settings?
Begin with calibration tests like temperature towers or retraction tests. These help you identify the ideal settings for your filament and printer. Adjust one parameter at a time, such as layer height or print speed, to observe its impact on print quality.
How do I prevent warping on large prints?
Use a heated bed and ensure it is level. Apply adhesives like glue sticks or painter’s tape for better adhesion. For materials like ABS, consider using an enclosure to maintain a stable temperature and reduce warping risks.
Why is my print stringing despite adjusting retraction settings?
Stringing may occur due to high extruder temperatures. Lower the temperature in small increments (e.g., 5°C) to reduce filament viscosity. Also, enable "wipe while retracting" in OrcaSlicer to clean the nozzle during retraction moves.
Can I use the same settings for all filament types?
No, each filament type requires specific settings. For example, PLA works best at 190-210°C with high cooling, while PETG needs 230-250°C and lower fan speeds. Use OrcaSlicer profiles to save optimized settings for different materials.
How do I know if my Z-hop settings are correct?
Test Z-hop with a calibration model. If the nozzle avoids collisions and the print surface remains smooth, the settings are correct. Start with a height of 0.2-0.4 mm and adjust based on your printer’s performance and model complexity.




Commenta
Nota che i commenti devono essere approvati prima di essere pubblicati.
Questo sito è protetto da hCaptcha e applica le Norme sulla privacy e i Termini di servizio di hCaptcha.